
This original drawing, made some time ago, I projected onto a Belle Arte extra primed panel which I use lot for sketching and made a base drawing layer using burnt umber, ivory black and titanium white. I’m all in favour of remaining in Europe but I must say the EU regulations against the sale of lead white which I used to use are completely unnecessary. I’ve had to adjust to Titanium and use a combination of Winsor and Newton Alkyd and Artist oil colours. Their flake white hue and mixing white give a good range of transparency when mixed with the full strength whites and of course give greater control over drying times.

I changed the hairdo to emphasise the head of the cardboard figure and using Old Holland oil painting medium pushed the image around until it all seemed to balance. The brushes used in this layer are mainly old and worn with a couple of newer Rosemary soft synthetics to smooth out once the main values are established.

A couple of days to dry thoroughly (one of the reasons for using Burnt Umber is it shortens the drying time dramatically). The paint is now a thin layer with no solid colour and the lighter areas are mostly from the primed base.

Onto this a series of opaque and transparent colours. Some artists at this point make a grisaille but I prefer to anticipate the end colour with cooler versions of the final hues essential various coloured greys. It helps me judge more clearly how to manipulate the glazes and keeps the underlying white more active. Also if there are areas I am unsure about I can still keep them loose in the drawing colour.
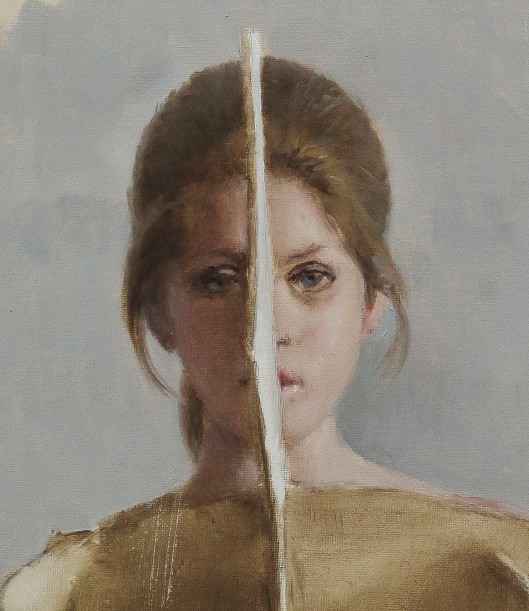
The face here is in the final underpainting stage. Finer detail will of course come later but one of the more important judgements to be made is the level of detail for the atmosphere of the painting. I know about Piero della Francesca’s recipe for detail being established by overall size but I prefer to vary the focus from area to area.

Part way through. The finished underpainting is at the top. Apart from drawing and other preparation the process so far has taken two full days. Sometimes things never get beyond this stage, or I make changes, but I avoid doing that if I can because it usually means losing the freshness of the brushwork.

The finished underpainting will dry for a couple of weeks at least and be ready for glazes to develop colour and space with probably a bit of redrawing.